Learning PySpark Part 1: Setting up an Environment
This is a series about learning PySpark, the Python API for Apache Spark. It is aimed at data engineers with a strong SQL background and who are just getting started with Spark and Python. This part is about setting up a local Spark environment to practice writing PySpark programs.
Setting up an environment
Docker is ideal for learning Spark and PySpark because it avoids having to set up a cluster. You just create a Spark container and it's ready to run PySpark programs.
Get a Spark image
I use the images published by Jupyter Docker Stacks, which are hosted on a registry called quay.io. These come with JupyterLab which includes the popular notebook interface for authoring Python code.
Here's a link to the image I'll be using: pyspark-notebook. Download the image onto your machine with the docker pull command:
docker pull quay.io/jupyter/pyspark-notebook:spark-3.5.3
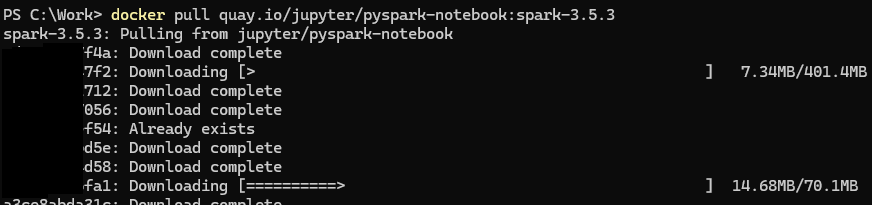
It will take a minute or two to complete and then it's available in Docker Desktop:
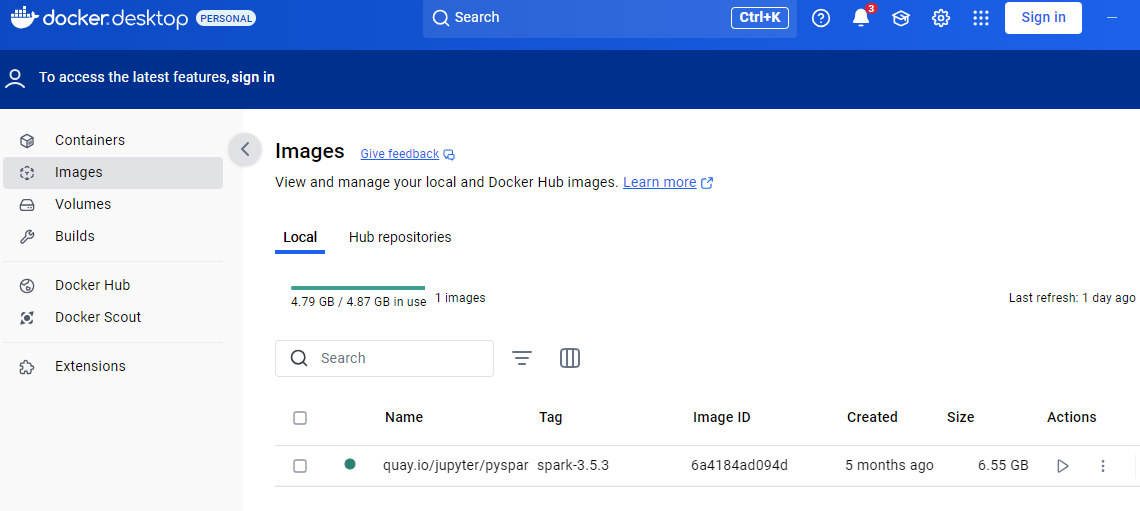
You might prefer the CLI. Here are several ways to list images:
docker images
docker image list
docker image ls
Image information is printed to the terminal:

Now that we have an image we can use it to create a container.
Create a container using Docker Desktop
Containers can be created and run using Docker Desktop or the CLI client. In Docker Desktop go to the Images view and click the Run action on the image listing. The following settings are optional:
-
Container name: If you don't set a name Docker assigns a random one for you, like "relaxed_babbage".
-
Ports: A container is an isolated environment so the ports on the host (your workstation) must be mapped to the ports on the container to allow traffic from the host to go to the container. This means the PySpark code run on host machine goes to the container running the Spark engine. This task is called publishing ports. Set the host port numbers to match the container's internal ports:
4040is the default port for Spark UI8888is the port used to access a Jupyter Notebook from your local workstation
-
Volumes: A local path can be mapped to a path in the container. I set the host path to a folder where I keep practice datasets. For example if you're on Windows
C:\work\sparkand Linux/home/james/src/spark-practice. Set the container path to/home/jovyan/work. -
Environment variables: These are used to customize a container's behaviour. I don't usually bother but sometimes use the
DOCKER_STACKS_JUPYTER_CMDenvironment variable to set which interactive frontend tool to use. The default value,lab, is JupyterLab. I sometimes set it tonotebookfor the minimalist experience of a Juypter Notebook without the bells and whistles of JupyterLab.
Here is an example:
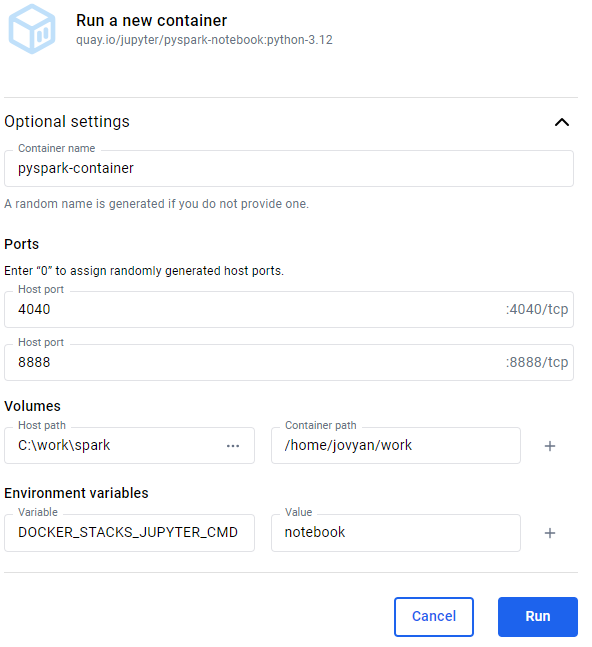
Clicking Run both creates and runs the container.
Create a container using the Docker CLI
The Docker CLI gives you more more options, like setting the current working directory.
Use docker run. Here's an example:
docker run `
    --name pyspark-practice `
    -it `
    --rm `
    -p 8888:8888 `
    -p 4040:4040 `
    -d `
    -v "C:\work\spark:/home/jovyan/work" `
    -e DOCKER_STACKS_JUPYTER_CMD=notebook `
    -w "/home/jovyan/work" `
    quay.io/jupyter/pyspark-notebook:python-3.12
Let's go through these options (the full list is in the documentation):
--namesets the name of the container.-itis two commands, often used together:-i(the shortform version of--interactive) and-t(the shortform version of--tty).--Interactive,-iallows shell commands to be sent the container interactively.-tty,-taccording to the docs "allocates a pseudo TTY". I've seen it explained as "it connects your terminal with stdin (standard input) and stdout (standard output)". It basically means that the output from the container be displayed in the PowerShell (or Bash) session that ran theruncommand. My understanding is that you would use this pair of options if you intend to interact with the container using shell commands.
--rmis used when you want to delete the container after you've done working. It's a clean up command, basically.-pspecifies the ports.-dis for detached. Use it to run the container in the background.-vsets the volumes. In this example we're indicating that the local directoryC:\work\sparkshould map to the container's directory/home/jovyan/work. You could also set the host volume to"${PWD}"which uses the current directory of the PowerShell (or Bash) session.-esets environment variables. This example sets theDOCKER_STACKS_JUPYTER_CMDenvironment variable which sets the frontend tool, e.g.,notebook(Jupyter Notebook).lab(JupyterLab) is the default (see the documentation).-wsets the working directory inside the container. Setting it equal to the volume path of the container is useful because means you can start reading files into Spark DataFrames without having to change directories.
I recommend the following options if you're unsure:
docker run `
    --name pyspark-practice `
    -p 8888:8888 `
    -p 4040:4040 `
    -v "C:\work\spark:/home/jovyan/work" `
    -w "/home/jovyan/work" `
    -d `
    quay.io/jupyter/pyspark-notebook:spark-3.5.3
I don't usually delete the container (--rm) because I don't want to configure and create a new one every time. I'm happy to stop and start the same container using the GUI in Docker Desktop. I don't use the -it commands because I haven't found a use for them since my time is spent learning PySpark in a notebook, not interacting with the container through shell commands. Detached mode (-d) because I'm creating the container using the CLI and thereafter I'll stop and start it using the buttons in Docker Desktop.
Accessing the frontend
Now that you've created a container the next step is to open the JupyterLab frontend. This is the environment in which we'll be writing PySpark programs. Check the logs of the running container for the URLs to access JupyterLab (or a different frontend if you changed the default).
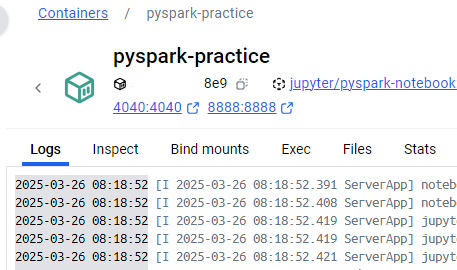
The log messages we're interested in look like this:
To access the server, open this file in a browser:
        file:///home/jovyan/.local/share/jupyter/runtime/jpserver-7-open.html
Or copy and paste one of these URLs:
        http://<hostname>:8888/lab?token=<token>
        http://127.0.0.1:8888/lab?token=<token>
I use the second URL: http://127.0.0.1:8888/lab?token=<token>. Open this in a browser and you will be directed to JupyterLab.
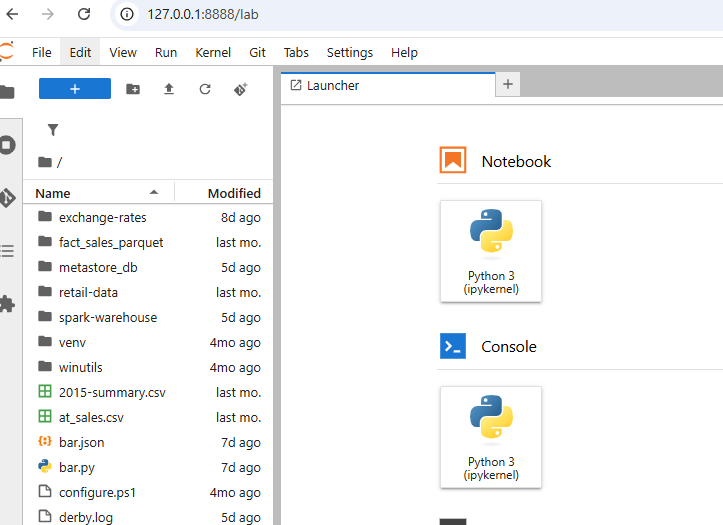
Notice the directory showing the contents of the C:\work\spark folder on my workstation.
You should get familiar with the API reference as it is very useful.
A first PySpark program
At this point we have a Spark cluster (well, your local machine) setup and an environment in which we can start learning PySpark.
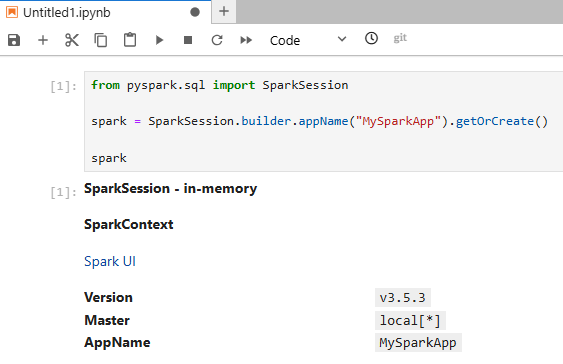
Add a notebook by clicking the Python 3 (ipykernel) button. Type the following Python code into the cell and press Shift + Enter to run it. If you don't understand the code don't worry. It's some standard boilerplate for creating Spark applications. I will explain it in part 2 of the series.
from pyspark.sql import SparkSession

spark = SparkSession.builder.appName("MySparkApp").getOrCreate()

spark
This is what you should see:
That's it for part 1.
Conclusion of part 1
The learning outcome in this series is to acquire working knowledge of PySpark, the Python API for Apache Spark. It's aimed at people with a data warehousing or business intelligence background, who write a lot of fact and dimension queries. You probably know a little bit of Python but need to quickly learn the essentials of PySpark.
In part 1 I've shown you how to get an environment setup using Docker. At this point you can go ahead and create small Spark applications to learn the PySpark API. In part 2 I will introduce the DataFrame API and in part 3 I will go into detail about how to transform data with the PySpark equivalents of the common SQL statements you're familiar with (e.g., SELECT, GROUP BY, ORDER BY, SUM, etc.)